Wednesday 17 September 2014

The Great Blogger Bake Off: Week 7 - Rhubarb and Custard Mille Feuille


I am so flippin' proud of myself this week. Not only did I pull of making puff pastry from scratch, but creme patissiere too. I think I've been playing it safe with my bakes up until now, sticking to things I know I can manage, so I decided this week to push myself a little bit further, and tackle Mille Feuille. 

It was really difficult recipe wise, considering most recipes tell you to use shop bought pastry, and whipped cream instead of creme patissiere. I was also expecting such a wide range of flavour combos when I was searching for some inspiration, considering mille feuille is only sweet pastry and cream/custard, but kept stumbling across boring old strawberries and rasberries, so I decided to wing it and do one of my all-time fave flavour duos. Nothing can beat good ol' rhubarb and custard. 

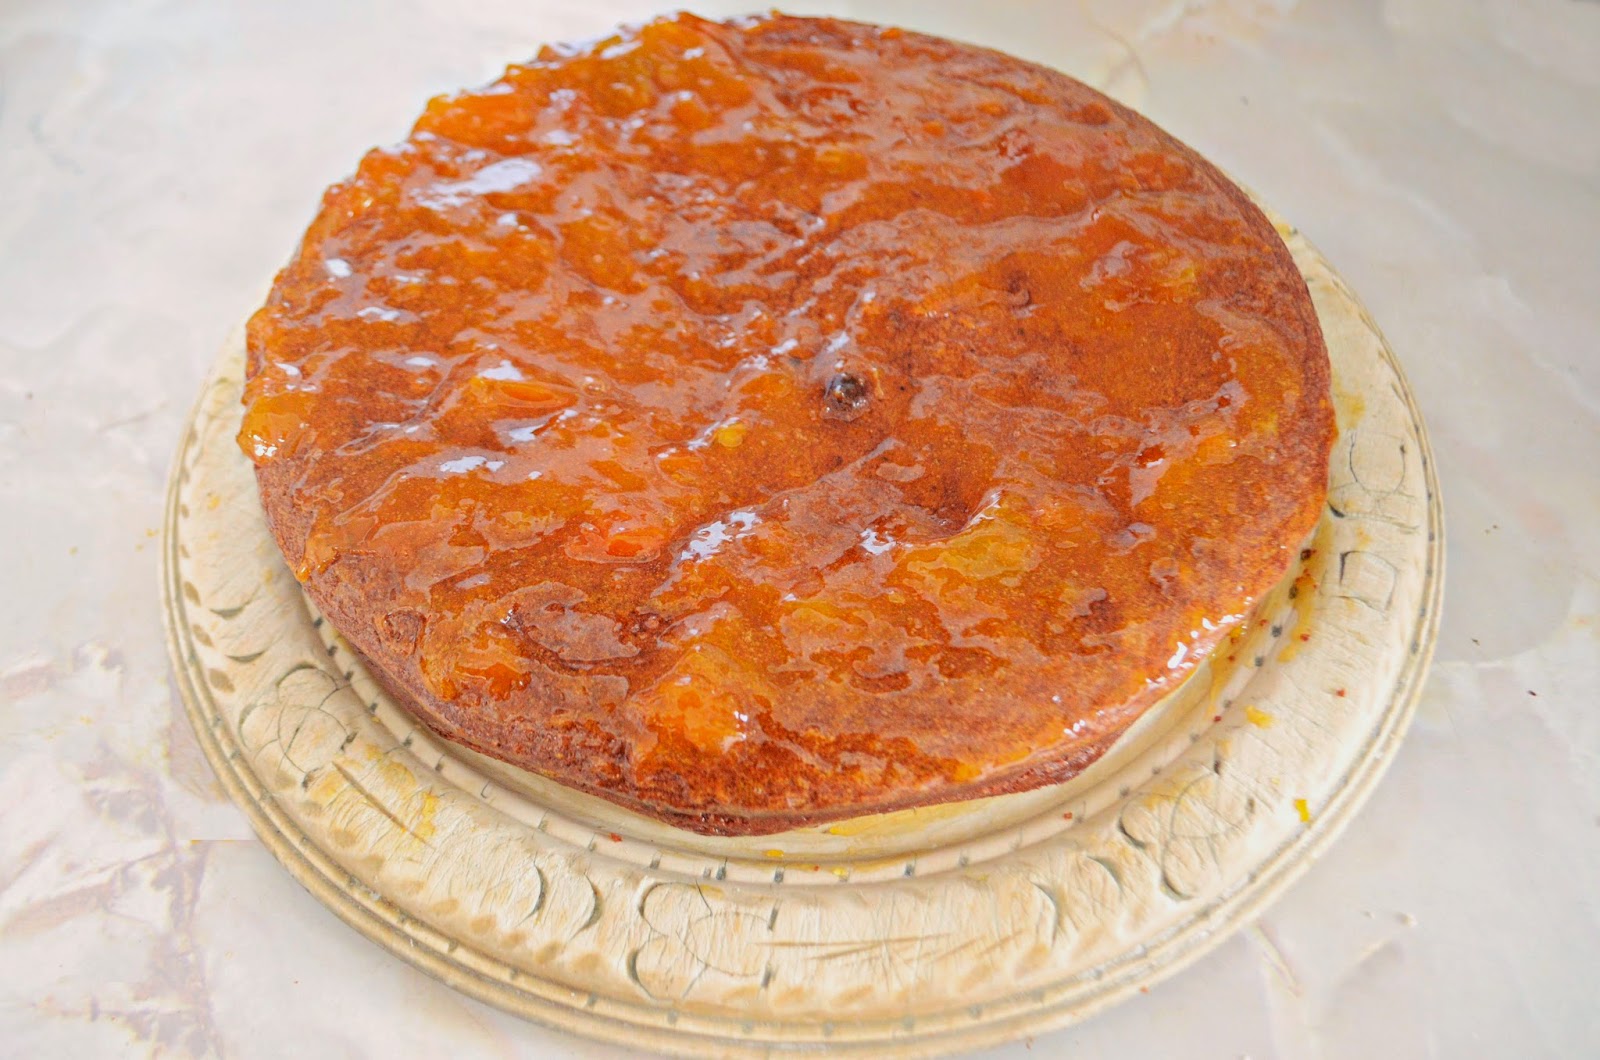
If I was to do this again, just from a presentation point of view, I would use raw rhubarb and stew it myself to maintain the pink colouring, because the green of the tinned rhubarb really isn't that appealing. 

Taste-wise though it was spot on. The sugar that's sprinkled over the pastry before it's baked adds just the right level of sweetness, and the tartness of the rhubarb combats any added sweetness that comes from the creme patissiere. It actually tasted like rhubarb and custard sweets. 

Despite having to piece together multiple recipes to create my own, this was actually a really easy bake to pull off, and I thoroughly enjoyed learning two brand new skills. 

So if you've ever been a bit intimidated by this multi-layered treat and are a sucker for old school penny sweets, why not give it a go!


Ingredients

Puff Pastry
250g strong plain flour 
1tsp fine sea salt 
3 tbsp caster sugar
250g butter, at room temperature, but not soft
about 150ml cold water
Creme Patissiere 
4 medium egg yolks 
65g caster sugar
15g plain flour
15g cornflour
350 ml whole milk 1/2 tsp vanilla bean paste 
icing sugar, for dusting. 
Filling
1 245g tin of rhubarb chunks in light syrup. 
Icing sugar to decorate. 


Method

1) Heat the oven to 200C / 180C fan / gas 6. 

2) Sift the flour and salt into a large bowl. Roughly break the butter in small chunks, add them to the bowl and rub them in loosely. You need to see bits of butter. 


3) Make a well in the bowl and pour in about two-thirds of the cold water, mixing until you have a firm rough dough adding extra water if needed. Cover with cling film and leave to rest for 20 mins in the fridge. 


4) Turn out onto a lightly floured board, knead gently and form into a smooth rectangle. Roll the dough in one direction only, until 3 times the width, about 20 x 50cm. Keep edges straight and even. Don't overwork the butter streaks. You should have a marbled effect. 


5) Fold the top third down to the centre, then the bottom third up and over that. Give the dough a quarter turn (to the left or right) and roll out again to three times the length. Fold as before, cover with cling film and chill for another 20 mins in the fridge. 

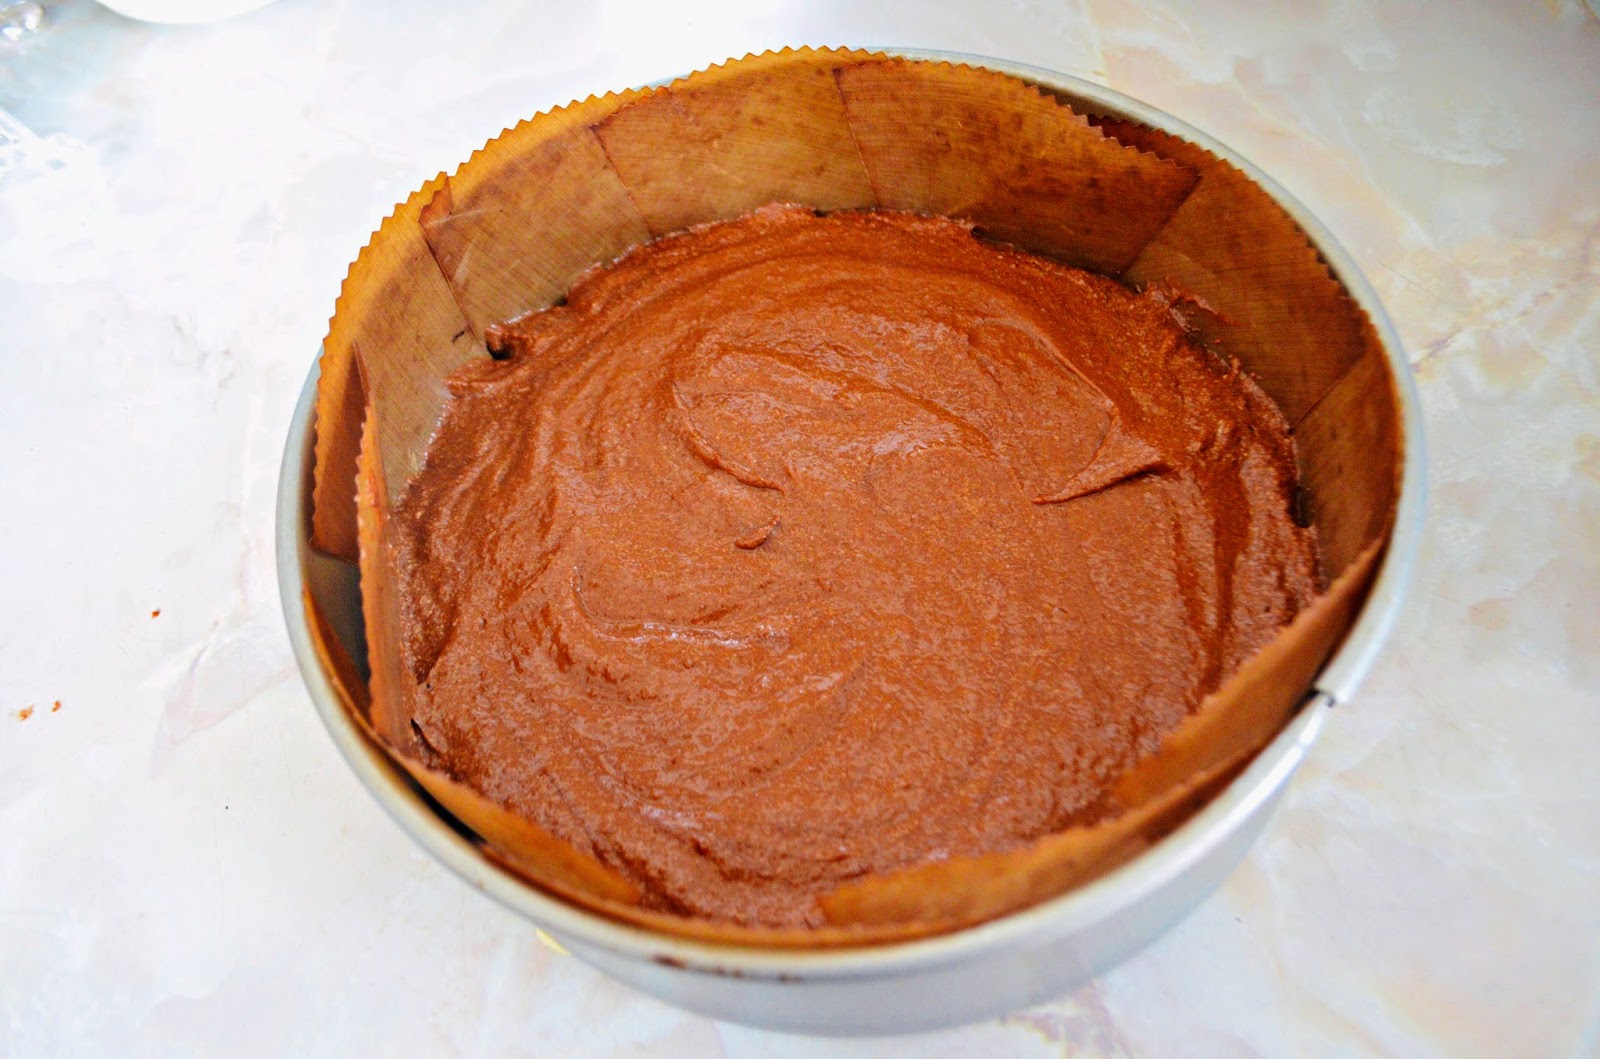
6) On a lightly floured surface scattered with a little sugar, roll out the pastry to a rectangle slightly larger than 28 x 30cm. Line a large baking tray with parchment and scatter with more sugar. Use the rolling pin to lift the pastry onto the baking parchment. 


7) Scatter more sugar over the pastry and cover with another sheet of baking parchment. Lay another heavy baking tray (or a heavy oven dish) on top and bake for 25-30 mins until the pastry is golden and crisp, then set aside to cool. 


8) To make the creme patissiere, whisk together the eggs and sugar in a large mixing bowl until they turn a pale golden colour. Whisk in the flour and cornflour and set aside. 


9) Place the milk and vanilla bean paste in a heavy-bottomed saucepan, bring to a gentle simmer, stirring frequently. Remove the pan from the heat and let cool for 30 seconds.


10) Slowly pour half of the hot milk onto the egg mixture, whisking all the time, then return the mixture to the remaining milk in the pan. It is important to slowly pour the hot milk onto the cold eggs before you return the mixture to the pan to prevent the eggs from scrambling. 


11) Bring the mixture back to the boil and simmer for one minute, whisking continuously, or until smooth. 


12) Pour the cream into a clean bowl and dust with icing sugar to prevent a skin forming. Cool as quickly as possible, by sitting the bowl of pastry cream in another large bowl of ice water. Leave to cool for 20 minutes. 

13) Using a ruler and a sharp knife, carve 10 x 6cm rectangles out of the pastry. You should be able to carve out 12 rectangles. 


14) Tip the cooled cream into a piping bag or a standard sandwhich / freezer bag, and snip off a tiny corner with a pair of scissors. Practice piping on some kitchen role to make sure the hole is the right size and the cream is at the right consistency. 

15) Drain the rhubarb. If it's too wet, it will make the rhubarb soggy. The best way to prevent this is to dry each individual piece of rhubarb before cutting it on some kitchen roll. 


16) Take your first rectangle, placing it horizontally in front of you, and pipe a thick line of the cream from the top to the bottom. Take two chunks of rhubarb, cut them in half and place them next to the the cream. Continue to alternate the cream and rhubarb until the pastry is covered. 

17) Place a piece of pastry on top of this and repeat the cream and rhubarb process, maybe alternating with the below layers so as to create a checkerboard effect. 

18) Place another layer of pastry on top of this to complete one mille feuille, and dust with icing sugar. 


READ MORE

Wednesday 10 September 2014

The Great Blogger Bake Off: Week 6 - Sachertorte


I'm not sure about the rest of the bloggers taking part in this Blogger Bake Off, but when they announced this week would be European cakes, my mind went blank. All I could think of was Tiramisu, which I made in week 4, and Croque en Bouche (way too technical for me). I've been doing so much research this past week as to what I could bake, and on my way I've come across some amazing looking cakes I never knew existed (my cake has a slightly more complicated pastry brother called the Fachertorte. It looks so scrummy!) However some of them looked extremely complicated, and as much as I would love to have given them a go, I really would have needed more practice. 

It was one evening that I had an epiphany and remembered last year's Bake Off contestants having the grueling task of making Mary Berry's Sachertorte with a very vague recipe, for the technical challenge. I remember thinking that it looked so glamorous and actually not too complicated once you have the full recipe, so I decide to give it a go. 

I found Mary Berry's recipe to be very simple and easy to follow, however I did have a bit of trouble with the piping. I've always veered away from piping because it terrifies me. I take it to heart when I try and get all creative with baking and it turns out looking poop, so this is the first time I've really donned my piping bag (I actually used a sandwich bag), closed my eyes and gone for it. I'm really pleased with how it turned out, but it would have been a disaster if I'd piped straight away. The best advice I can give to anyone with similar piping fears is PRACTICE. Just have a little squiggle on some kitchen roll just so you get the hang of handling the bag. 

I'd like to think if I was on the show tomorrow, Mary Berry would be happy with my shiny chocolate and piping skills. 

Ingredients

For the topping and the icing


Method


1) Preheat the oven to 180C/350F/Gas 4. Grease a deep 23cm round cake tin then line the base with greaseproof paper.

2) Break the chocolate into pieces, melt gently in a bowl set over a pan of hot water, stirring occasionally, then cool slightly. Beat the butter in a bowl until really soft, then gradually beat in the sugar until the mixture is light and fluffy. Add the cool chocolate and the vanilla extract and beat again. Add the egg yolks, then fold in the ground almonds and sieved flour. The mixture will be quite thick at this stage.


3) In a separate bowl whisk the egg whites until stiff but not dry. Add about one third to the chocolate mixture and stir in vigorously. Gently fold in the remaining egg whites. Pour the mixture into the prepared tin and level the surface. 


4) Bake in the oven for about 45-50 minutes, or until well risen at the top and the cake springs back when lightly pressed with a finger. Leave to cool in the tin for a few minutes then turn out, peel off the paper and finish cooling on a wire rack.


5) To make the topping, heat the apricot jam in a small pan and then brush evenly over the top and sides of the cold cake to build up a layer. Allow to set


6) Make the icing by breaking the plain chocolate into pieces. Heat the cream until piping hot, remove from the heat and add the chocolate. Stir until the chocolate has melted, then cool till a coating consistency. Then pour the icing on to the centre of the cake. Spread it gently over the top and down the sides, and leave to set. 


7) For the 'icing' writing, break the milk chocolate into pieces then melt gently in a bowl set over a pan of hot water. Spoon into a small paper icing bag or a sandwich bag if you don't have one and snip off the corner. Before piping onto the cake have a little practice on some kitchen role, just to make sure the consistency is right.  Pipe 'Sacher' across the top and leave to set. 


READ MORE

Wednesday 3 September 2014

The Great Blogger Bake Off: Week 5 - Pecan Pie


If you don't like pies, I don't want to be your friend. 

I would rather have a wedding pie than a wedding cake, so I was so excited to get pie making. 

Now pecan pie is actually a large part of my childhood. Mum used to buy a pecan danish from the supermarket and it was my favourite dessert, but then they stopped making them and I haven't had one since, so anything remotely close to it has nostalgia in every mouthful. 

It's a classic, and is surprising easy to make (I'm pretty rubbish at dough) and the spelt flour gives the base a light, digestivy taste. 

This pecan pie is soooo bad for you, but is brilliant for a special occasion where you can justify having a naughty treat. 


Ingredients
Pastry
225g spelt flour
75g golden caster sugar
125g unsalted butter chilled and diced
1 medium egg separated
milk
Filling
200g pecan nutsw
juice and finely grated zest of 1 lemon
300g golden syrup
3 medium eggs plus 2 egg yolks
300ml double cream
pinch of sea salt
icing sugar for dusting (optional) 

Method
1) Place the flour, sugar and butter in the bowl of a food processor and give it a quick burst at high speed to reduce it to a crumb-like consistency. 

2) Add the egg yolk and then, with the motor running, trickle in just enough milk for the dough to cling together in lumps (a teaspoon or two should do it). Bring the dough together into a ball using your hands, then pat into a flattened patty. Wrap in cling film and chill for at least 1 hour or overnight. 

3) Have ready a loose-bottom tart tin about 23cm x 5cm (9in x 2in ). Preheat the oven to 200c/180c fan/ gas 6. 

4) Lightly dust a work surface with spelt flour, knead the pastry until it is pliable, then roll it out thinly. Line the base and sides of the tin by slipping the base under the rolled pastry and then into the tin, gently pressing it in. 

5) Trim the edges and reserve trimmings. Line the case with foil and baking beans, securing the sides to the tin. Place on a baking sheet and bake for 15 minutes. Remove the foil and beans, brush the case with the egg white, patch any cracks with the trimmings and cook for another 10 minutes until evenly golden. 

6)Turn the oven down to 170C/ 150C fan / gas 3. Thinly slice two thirds of the nuts. Whisk the lemon juice and zest into the syrup in a large bowl, then whisk in the eggs and the egg yolks and finally the cream. Fold in the sliced nuts and salt. Pour the mixture into the the precooked pie case and arrange the remaining pecans flat-side down over the surface. 

7) Bake for 60 minutes until lightly golden and puffy at the edges  (if you move the tart around it should wobble without showing any signs of being liquid). 

8) Remove from the oven and leave to cool for a couple of hours. 


READ MORE

Friday 29 August 2014

Y SPA at Wyboston Lakes - A Girly Retreat


So yesterday I had my first ever spa experience. At 22, I'm probably a bit behind on experiencing the fluffy towels and complimentary slippers, but I was like a little kid at Christmas. 

A girl at work is leaving, and had organised a spa day for a few of us.We managed to get a group deal that meant if we went in pairs, we only had to pay £27 each instead of £44. This included afternoon tea as well as free reign of the spa (treatments were extra). 

Having never gone to a spa before, I wasn't sure whether this was a bargain or a rip off, and I guess all spas differ as to what deals they offer, but this was most definitely a bargain. 

We started the day off with our afternoon tea. Now afternoon tea has become a major food trend recently, so you don't have to venture to some pretentious tea rooms in London for the 'ladies that lunch' experience. But there's nothing worse than a bad afternoon tea, so I was intrigued as to how nice this one was going to be. I was actually really surprised. Sandwiches are sandwiches at the end of the day, and if you get them wrong you're a bit of a numpty. It's the cakes that are the real test. This afternoon tea came with the classic scones, jam and cream, which were gooey and really filling, Victoria Sponge squares and a strawberry mousse cheesecake which was so yummy. It all looked really pretty and was so filling that I felt I was going to sink when I got in the pool. One of the girls that was with us was gluten and soya intolerant, and the restaurant staff really went out of their way to accommodate her, with her own sandwich selection and some gorgeous looking desserts in cute jars. 

After our tea, we heaved our full tummies over to the changing rooms to adorn ourselves head to toe in fluffiness. The changing rooms themselves were of a boutique design, with individual vanity booths which included a hairdryers that were free to use. 

The spa area itself was quite small, with a salty steam room, a soft steam room, a sauna, and showers dotted around for cooling down. I'm such a wimp when it comes to heat that I could only manage 5 minutes max in each room. The pool area was my favourite though. Again it wasn't very big, but we were lucky that it wasn't very busy either. It was stationed outside and consisted of a hydrotherapy pool, a jacuzzi, a chilled decking area with cozy sofas and a fireplace, and a 'Some Like It Hot' steam room that reaches 85 degrees (I stayed well away from this). The pool was lovely and warm so it didn't matter if it got a bit overcast. Once we were as wrinkled as prunes we had a cheeky glass of wine each by the fire and a lovely catch up. 

I'd say this is a perfect day out for a group of girls, or even couples, and if you're one of those people who can spend a good few hours doing nothing, you'll definitely get your money's worth. Due to size however I can imagine during weekends it will be a lot busier, and it will be harder for you to make the most of it, so if you can weekdays are best. 

Everyone needs a bit of time to relax, and when there's something like this on your doorstep, I say milk it for all its worth! 


READ MORE